Page 1 of 1
How did you modify an Improved car tail light bracket to work on the righ hand side?
Posted: Tue Dec 01, 2020 8:47 am
by Mark Nunn
I want to add a second tail light to my '26 Runabout. My car's tail light housing didn't have a socket for a bulb when I got it. I installed a 2-pin socket in the housing and a brake light switch. I now have a working light. Then one day, George (aka UPRR) hand-delivered another improved-car tail light so now I want to add a second light on the right side.
I restored the newly acquired light and license plate bracket and plan to put that on the left side. I'm going to cut the license plate bracket off the old unit and install it on the right side. I have what I need to mount the light but I need ideas on how to cut off the license plate portion without looking like a hack job. Can anyone share a photo of what they have done?
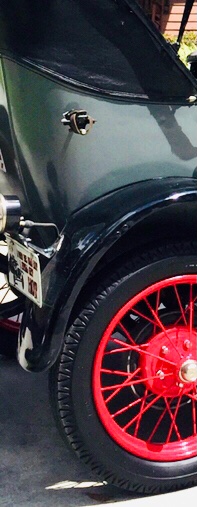
This is my new unit during it's restoration.
Re: How did you modify an Improved car tail light bracket to work on the righ hand side?
Posted: Tue Dec 01, 2020 8:54 am
by DanTreace
Mark
Your light plan and modification looks good.
Can’t help on how to trim off the license arms, I left it in place and added a vanity plate to Dixie! Reads ‘I may be old...But still get hot’

- 7753CCF3-C139-467E-BBDE-5B4CEC7CAA21.jpeg (50.75 KiB) Viewed 2304 times
Re: How did you modify an Improved car tail light bracket to work on the righ hand side?
Posted: Tue Dec 01, 2020 8:55 am
by Mark Gregush
Another option would be keep the plate holder and add a year of manufacture or club plate to the that side. It would not be unheard off doing this, there are a number of Model A's out there that this has been done.
Re: How did you modify an Improved car tail light bracket to work on the righ hand side?
Posted: Tue Dec 01, 2020 9:45 am
by TWrenn
I used these two items for the right side of my '25. It works fantastic, I used a double contact socket so I now have tail light/stop/turn on both.
https://www.modeltford.com/item/6593TL-R.aspx
https://www.modeltford.com/item/8785R.aspx
If it weren't so cold and snowy out I would go out to the barn and take a pic of it for you! Sorry!

Re: How did you modify an Improved car tail light bracket to work on the righ hand side?
Posted: Tue Dec 01, 2020 10:43 am
by dobro1956
I also left the bracket in place and have two plates. My second plate is a porcelain Arkansas Razorback plate approx 1926-27 vintage.
Re: How did you modify an Improved car tail light bracket to work on the righ hand side?
Posted: Tue Dec 01, 2020 11:00 am
by Mark Nunn
I have the light mounting parts and repro hardware. The license plate bracket that came on my car is rust-pitted, cracked and bent. I have no apprehension about cutting it down. My new light is an original Ford item and in much better condition. The plate or badge idea is interesting. I could have a custom badge laser cut for that side. But what...? I'll have to think about that. Thanks.
Re: How did you modify an Improved car tail light bracket to work on the righ hand side?
Posted: Tue Dec 01, 2020 11:43 am
by John.Zibell
Don't forget the backing plate for the bracket.
https://www.modeltford.com/item/8785PL.aspx
Re: How did you modify an Improved car tail light bracket to work on the righ hand side?
Posted: Tue Dec 01, 2020 11:47 am
by TWrenn
Good advice John, altho I elected to use smallish fender washers instead. Finally had to head out to the barn, so heres a pic of said right side lamp with the tail light on. You wouldn't believe how bright the brake light is!