Page 1 of 1
Ageold problem of headlight rim removal solved.
Posted: Sun Mar 07, 2021 9:11 am
by DickC
My recent purchase of a 25 T had the headlight lens loose and continued to rattle. I scanned the forum as to how to remove the rim that was too tight to rotate easily. Many good suggestions. I did not have the newest tool so had to make do with what I had. I am a carpenter and have several sizes of squeeze clamps. I took an old inner tube and cut a piece about 20 inches long by about 2 inches. I wrapped the rubber around the light and inserted the squeeze clamp so the rubber on the squeeze clamp hit the rim on the left side just above the rivet and the right side just below the rivet. Gently squeezed the clamp and then pushed in and rotated the clamp to the left. Worked like a charm!! The next challenge was installing the rope around the reflector and keeping it there until the rim with the glass was installed. I used the stickiest axle grease I could find. I applied eight or nine dabs around the rim and it held the rope enough to install the rim. I coated the rim of the headlight shell lightly so maybe it will not be so difficult to remove the next time. I hope I didn't bore the old timers but maybe helped newbes in their struggles. Dick C.
Re: Ageold problem of headlight rim removal solved.
Posted: Sun Mar 07, 2021 10:37 am
by Dan McEachern
Thanks for sharing! Another trick regarding the rope is to stick it in place on the reflector with a few dabs of superglue.
Re: Ageold problem of headlight rim removal solved.
Posted: Sun Mar 07, 2021 10:58 am
by Steve Jelf
I made this tool. It comes apart at the hinge and rides under the seat. I lined it with Gorilla tape.
Re: Ageold problem of headlight rim removal solved.
Posted: Sun Mar 07, 2021 11:01 am
by Jeff Hood
I have found that the best way to remove a stubborn headlight ring is to remove the whole headlight (there is only one nut) and lay it face down on the floor on an old rubber mudflap or one of the floor mats. Then you can use your body weight to push the bucket down while turning it with the stem. Works like a charm! It's also a good time to clean the rust from the end of the stem and the fender bracket hole for an improved ground connection.
Re: Ageold problem of headlight rim removal solved.
Posted: Sun Mar 07, 2021 5:21 pm
by CudaMan
If you do decide to wrestle one off while it is on the car, put a pillow or spread a blanket on the floor under the headlight in case the lens pops out and falls to the floor during removal.

Re: Ageold problem of headlight rim removal solved.
Posted: Sun Mar 07, 2021 8:25 pm
by DHort
Never heard of a squeeze clamp. Don't think Google has either.
Re: Ageold problem of headlight rim removal solved.
Posted: Sun Mar 07, 2021 9:23 pm
by RajoRacer
Our Carbon Canyon Club made a similar "squeeze" type out of flat bar for a work party project one Saturday years ago - worked great. I've not seen anyone attempt to use that type from the side, though !
Re: Ageold problem of headlight rim removal solved.
Posted: Mon Mar 08, 2021 5:18 am
by DickC
DHORT--I am a woodworker and we have secrete tools we use in our business. If you want to see what I used as a clamp, GOOGLE woodworkers squeeze clamp. There are about 100 different brands and sizes. I used an 18 inch bar size. Dick C.
Re: Ageold problem of headlight rim removal solved.
Posted: Mon Mar 08, 2021 6:47 pm
by John Warren
It looks like the one Steve made should work very well!
Re: Ageold problem of headlight rim removal solved.
Posted: Mon Mar 22, 2021 3:58 pm
by DontKnowMuch
DickC,
Could you post a picture of the "squeeze clamp" you use? I have a lot of woodworking clamps but I'm not familiar with that name for them.
Thanks
Re: Ageold problem of headlight rim removal solved.
Posted: Mon Mar 22, 2021 10:19 pm
by DHort
is this what you mean?
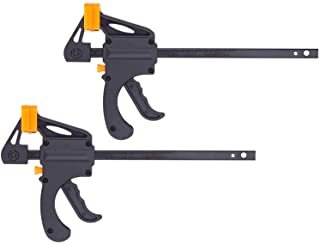
- squeeze.jpg (7.55 KiB) Viewed 3418 times
Re: Ageold problem of headlight rim removal solved.
Posted: Mon Mar 22, 2021 11:46 pm
by Burger in Spokane
I cannot seem to find a photo at the moment, but I had this problem early
on in my T affliction. I was loaned a tool that worked so well, I had it replicated
by someone of superior machining skills and tools than I. Basically, it looks like
capital "H". Made of 1.25" round bar, two legs facing the same direction have
a slot cut in to the inside facing side of the radius, precisely matching the
measurements of the headlight ring and the nub used to twist and lock them
on to the headlight body. The overall size and use of round bar allows the user
a lot of leverage, without creating inward clamping pressure to make the hold
even harder to break. The round bar was beveled a little at each end, making it
quite comfortable to handle, even when applying twist pressure. Works great,
and gives the user a very positive feel of the movement going on, to avoid breaking
anything.
Rhythm Method with WD40
Posted: Tue Mar 23, 2021 12:54 am
by Novice
Haven't bought one yet but Harbor freight sells a Pittsburgh strap wrench set for $4.99 with two different size wrenches. looks like it would loosen a head light rim easily. The first one or two I tried to remove on My first model T were the pits. till I developed a rhythm. hands on opposite sides of the rim on the rivets push wiggle and turn and a little help from a thin application of wd40 to grease the rim to housing contact. still doesn't fly on but fairly easy. I use Bondic UV adhesive compound around the glass bulb to metal base on all my NOS head and tail light bulbs. keeps the glass bulb from twisting off in the base. AX Me how I know. most of the old glue they used 75 to 100 years ago is now no longer holding or just barley bonding. and even with gentle handling can break the seal. and if You have a bulb stuck in the socket You haft to wrestle out there is a good chance the old glue will fail and glass bulb will twist in it's base.