Page 1 of 1
New style Starter Switch fix
Posted: Sat Mar 02, 2024 11:57 pm
by varmint
New style Starter Switch fix
Saturday a week ago, I drove our Model T for the first time, only 14 feet and stopped because the garage door was closed. On the next attempt, I pressed the starter switch and it stuck with the starter spinning. After some "excitement" I got it off. This was a new starter switch that I got about six years ago and have since read on the forum, is junk. I almost bought an original style switch but it
needed fixing too. Here is my one week journey in many photos:
I removed it and took the switch apart. More correctly, I opened it and pieces fell out.
The spring is too tight for the rest of the components.
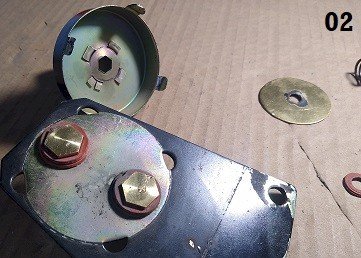
- 02.jpg (32.45 KiB) Viewed 4769 times
The discs look too thin.
The top piece, if (when) it were to fail would drop the discs and close the circuit.
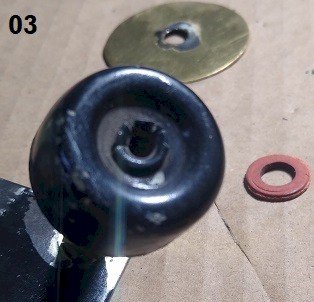
- 03.jpg (24.47 KiB) Viewed 4769 times
This thing failed to do its job.
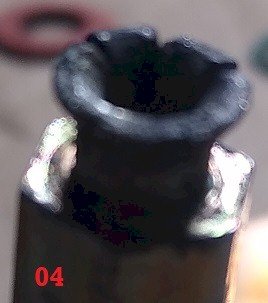
- 04.jpg (16.43 KiB) Viewed 4769 times
I decided to drill a hole, using the flange as a bit guide.
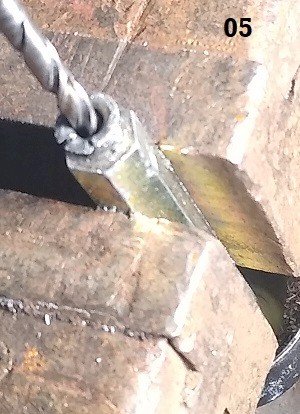
- 05.jpg (42.88 KiB) Viewed 4769 times
Re: New style Starter Switch fix
Posted: Sun Mar 03, 2024 12:08 am
by varmint
The top got cut off as I didn't need it.
Going to tap a #10-32 and use a screw to hold the pieces on better than they were before.
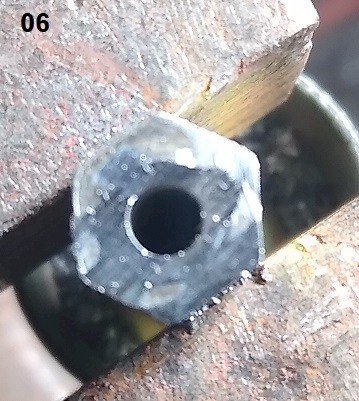
- 06.jpg (51.11 KiB) Viewed 4764 times
Nope, not gonna happen. Broke the tap.
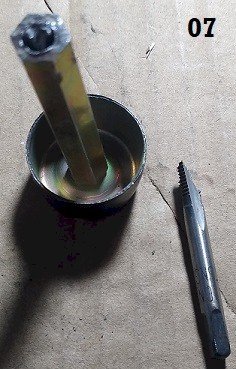
- 07.jpg (30.96 KiB) Viewed 4764 times
Drilling out the top to remove the hex bar.
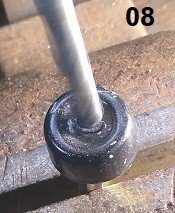
- 08.jpg (15.61 KiB) Viewed 4764 times
I will re-use the top only.
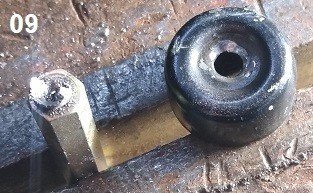
- 09.jpg (27.92 KiB) Viewed 4764 times
Beginning to use a 1/4"-20 carriage bolt as a replacement.
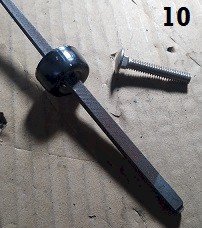
- 10.jpg (17.26 KiB) Viewed 4764 times
Re: New style Starter Switch fix
Posted: Sun Mar 03, 2024 12:14 am
by varmint
It fits great. And the top is not tilted like it was when brand new.
Acquired a coupling nut 1/4"-20 and use another 1/4" (upgraded size) for the disc on the bottom.
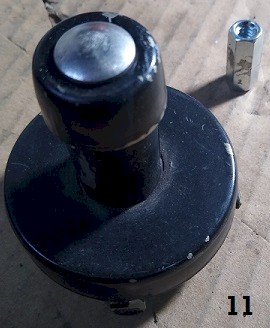
- 11.jpg (24.19 KiB) Viewed 4763 times
Will the spring will fit?

- 12.jpg (40.53 KiB) Viewed 4763 times
How far to screw into the coupling nut?
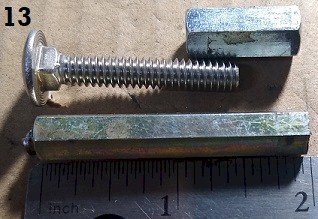
- 13.jpg (25.77 KiB) Viewed 4763 times
The hex hole is too small at the moment.
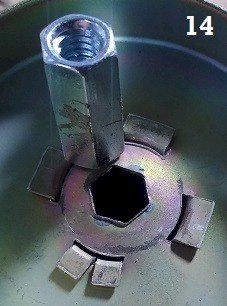
- 14.jpg (19.29 KiB) Viewed 4763 times
A file took care of that.
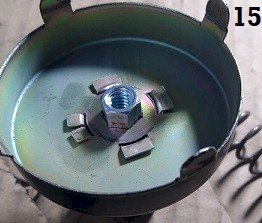
- 15.jpg (17.26 KiB) Viewed 4763 times
Re: New style Starter Switch fix
Posted: Sun Mar 03, 2024 12:19 am
by varmint
The tabs were loose. Tighten for now and address later.
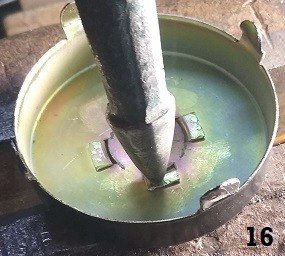
- 16.jpg (24.35 KiB) Viewed 4757 times
A screw for the bottom disc.
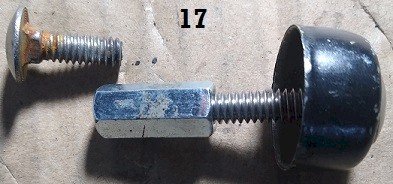
- 17.jpg (25.34 KiB) Viewed 4757 times
A nut to hold the top tight but the spring needs to be wider at the top.
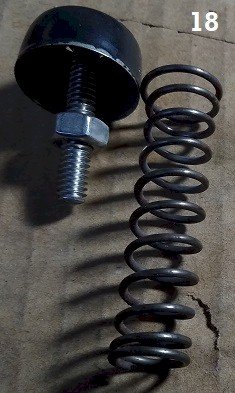
- 18.jpg (29.59 KiB) Viewed 4757 times
And yet a little more open to surround the nut.
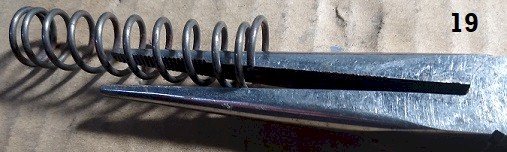
- 19.jpg (29.09 KiB) Viewed 4757 times
A little help from some red.
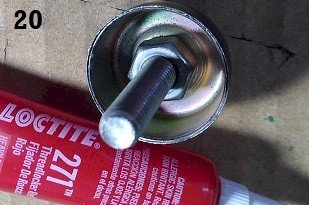
- 20.jpg (24.13 KiB) Viewed 4757 times
Re: New style Starter Switch fix
Posted: Sun Mar 03, 2024 12:25 am
by varmint
This was once a computer heat sink but you can source copper from elsewhere.
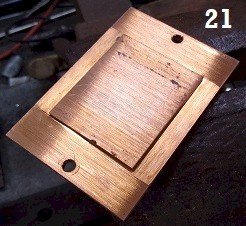
- 21.jpg (20.9 KiB) Viewed 4755 times
Shave off the top side where the fins were.
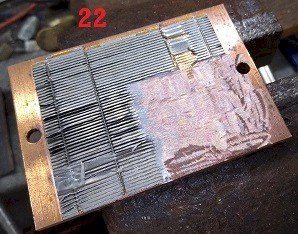
- 22.jpg (30.91 KiB) Viewed 4755 times
Using the toy as a template.
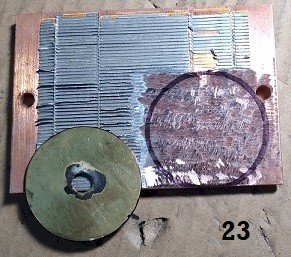
- 23.jpg (33.64 KiB) Viewed 4755 times
Cut off wheel and then a coping saw to cut it out.
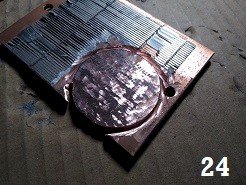
- 24.jpg (18.65 KiB) Viewed 4755 times
Going to reuse the insulator and add a washer to protect it from the force of the spring or stepping action.
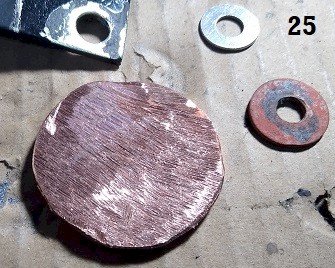
- 25.jpg (39.01 KiB) Viewed 4755 times
Re: New style Starter Switch fix
Posted: Sun Mar 03, 2024 12:33 am
by varmint
The lower screw needs to hold this in place without grounding it out.
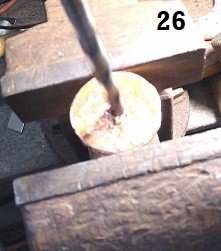
- 26.jpg (17.15 KiB) Viewed 4751 times
More help from red on the coupling nut.
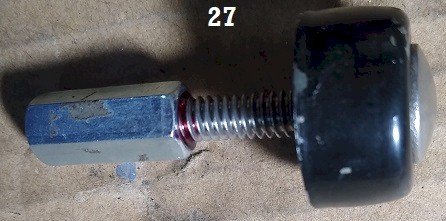
- 27.jpg (30.08 KiB) Viewed 4751 times
Tracing a better insulator for the main housing. This black plastic came from a battery backup that powers computer servers.
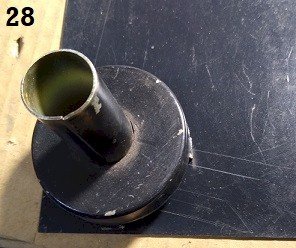
- 28.jpg (24.05 KiB) Viewed 4751 times
This will prevent grounding out if the disc twists up on one side.
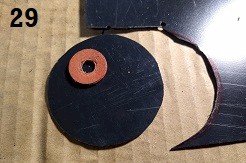
- 29.jpg (14.87 KiB) Viewed 4751 times
Trimming to fit the top insulator.
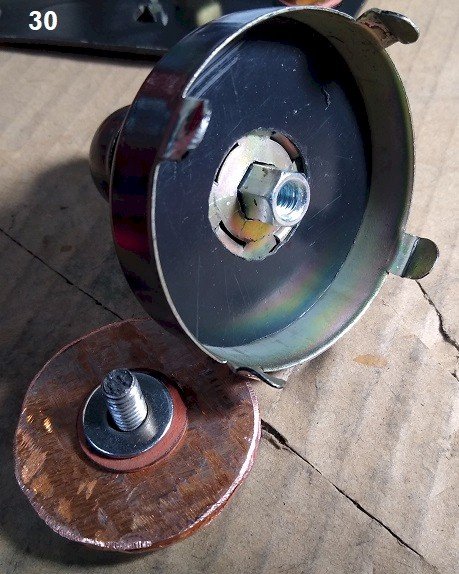
- 30.jpg (79.64 KiB) Viewed 4751 times
Re: New style Starter Switch fix
Posted: Sun Mar 03, 2024 12:40 am
by varmint
Will the screw fit? We are not finished and I hope you know why.
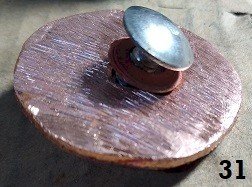
- 31.jpg (18.11 KiB) Viewed 4749 times
Is there interference? Screw gets its head diameter reduced by 1/16".
The square of the carriage was removed.
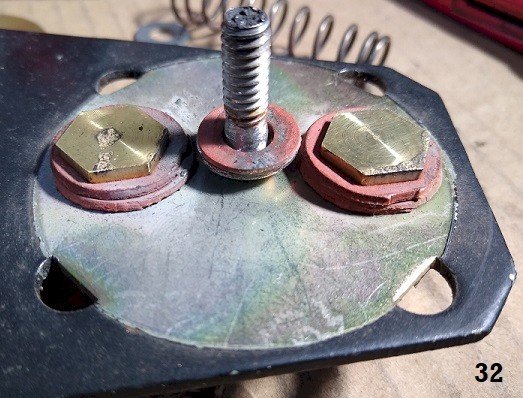
- 32.jpg (67.6 KiB) Viewed 4749 times
Cutting a slot.
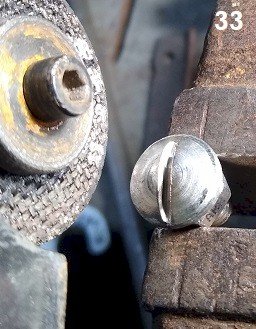
- 33.jpg (30.42 KiB) Viewed 4749 times
Cutting it shorter to fit inside the coupling nut.
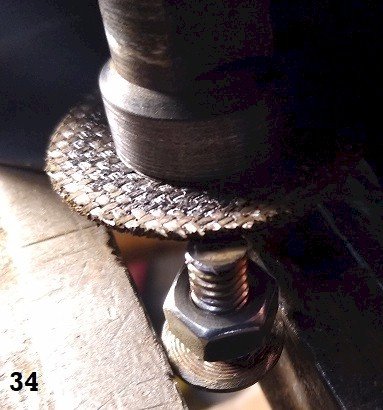
- 34.jpg (40.65 KiB) Viewed 4749 times
It's easier to fix thread burs if you already have a nut in place and then just remove it.
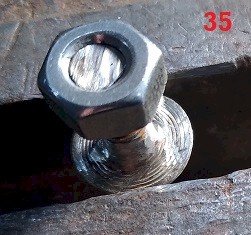
- 35.jpg (21.6 KiB) Viewed 4749 times
Re: New style Starter Switch fix
Posted: Sun Mar 03, 2024 12:48 am
by varmint
Will the bottom screw go in enough to clamp the pieces?
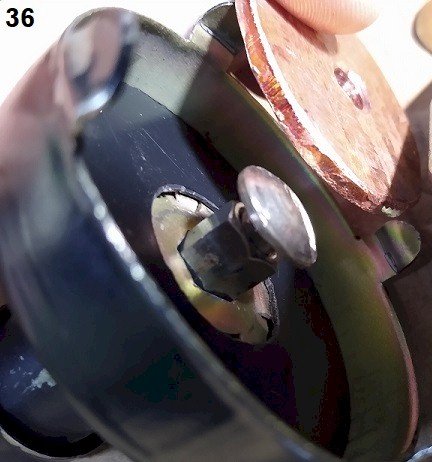
- 36.jpg (42.39 KiB) Viewed 4747 times
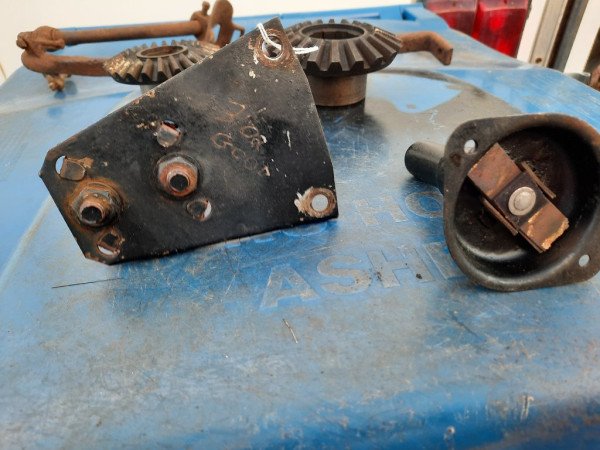
Pieces from left to right as they will be assembled.
ID is 1/4". OD needs to be 3/8".
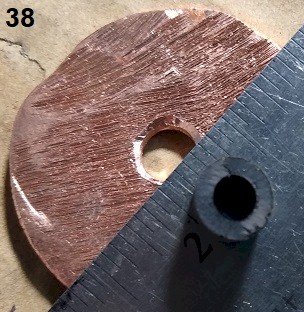
- 38.jpg (37.28 KiB) Viewed 4747 times
Drilled copper to 3/8" and test fit.
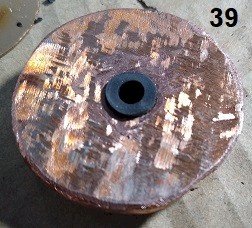
- 39.jpg (24.61 KiB) Viewed 4747 times
Cutting off the excess.

- 40.jpg (14.35 KiB) Viewed 4747 times
Re: New style Starter Switch fix
Posted: Sun Mar 03, 2024 12:54 am
by varmint
Does the 1/4" screw fit?
Will it be insulated now?
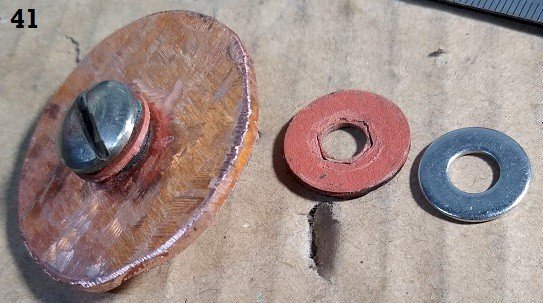
- 41.jpg (61.79 KiB) Viewed 4743 times
Assembly.
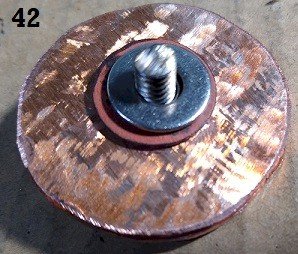
- 42.jpg (31.05 KiB) Viewed 4743 times
The coupling nut stuck. So, tapping the hex hole upward.
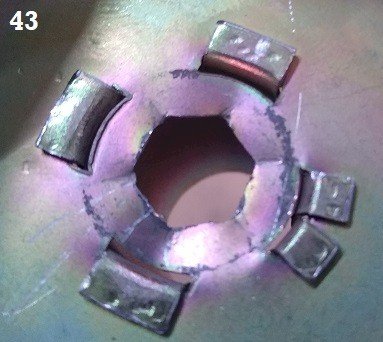
- 43.jpg (32.53 KiB) Viewed 4743 times
Removed the rounded edge. Problem solved.
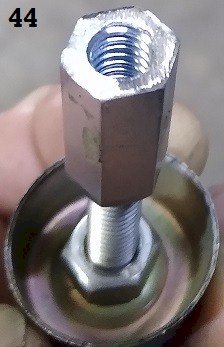
- 44.jpg (20.93 KiB) Viewed 4743 times
Removing paint. Why?
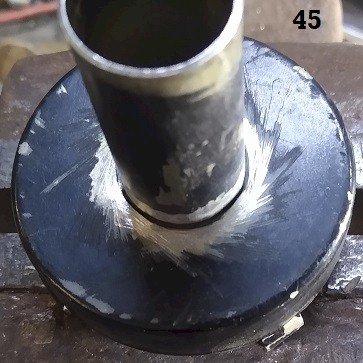
- 45.jpg (38.29 KiB) Viewed 4743 times
Re: New style Starter Switch fix
Posted: Sun Mar 03, 2024 1:00 am
by varmint
Four on the bottom.

- 46.jpg (44.09 KiB) Viewed 4734 times
Four button ups on the side and grind.
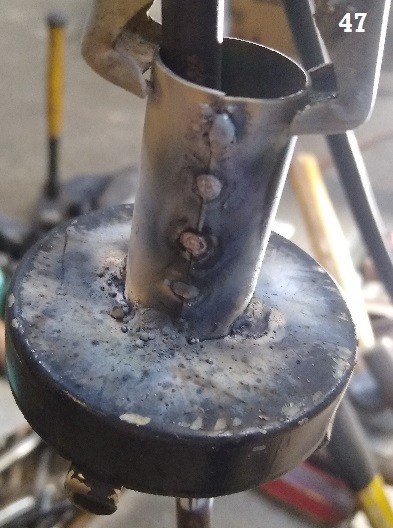
- 47.jpg (59.24 KiB) Viewed 4734 times
Spring is still too tight.
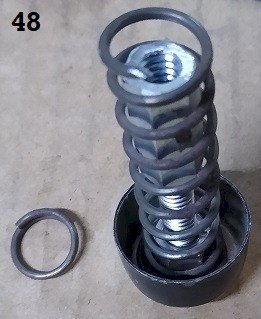
- 48.jpg (22.28 KiB) Viewed 4734 times
Looking for Ohms everywhere, switch at rest and pressed down.
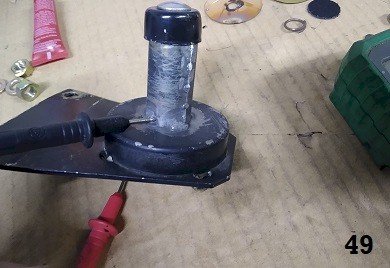
- 49.jpg (28.75 KiB) Viewed 4734 times
Testing but no red yet. Did not bend the tabs yet either.
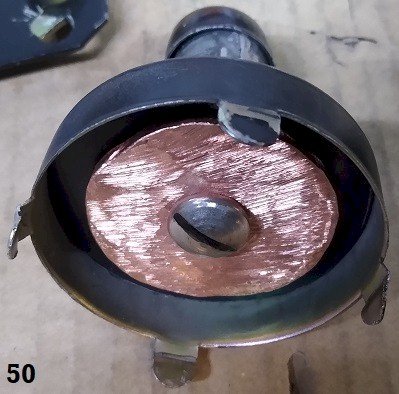
- 50.jpg (41.41 KiB) Viewed 4734 times
Re: New style Starter Switch fix
Posted: Sun Mar 03, 2024 1:13 am
by varmint
Working out the work-in on the tabs.
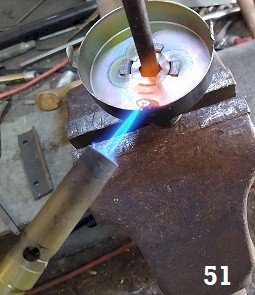
- 51.jpg (27.49 KiB) Viewed 4727 times
Annealed.
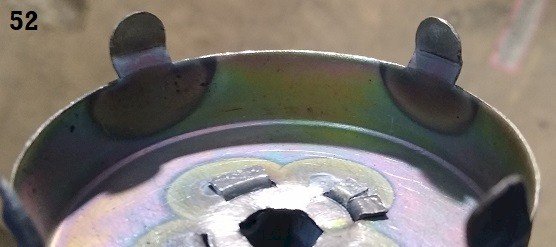
- 52.jpg (30.91 KiB) Viewed 4727 times
Is this a drain hole I see?
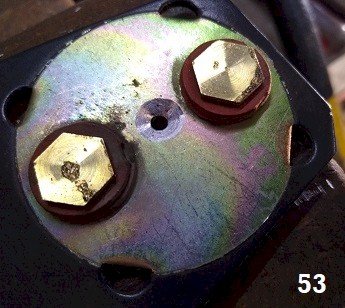
- 53.jpg (35.74 KiB) Viewed 4727 times
A little bit more. Or is it a relief cut for the screw?
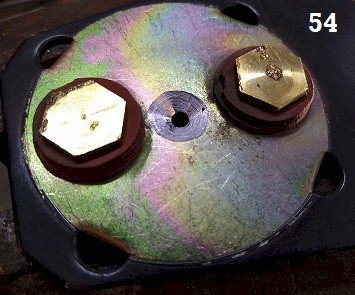
- 54.jpg (36.83 KiB) Viewed 4727 times
It's both. So many issues with the new switch are being addressed.
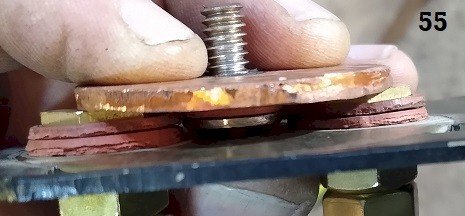
- 55.jpg (28.4 KiB) Viewed 4727 times
Re: New style Starter Switch fix
Posted: Sun Mar 03, 2024 1:25 am
by varmint
The screw head center has been surfaced.
Got some help again from red.
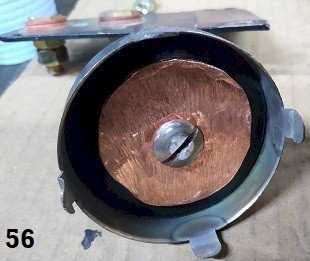
- 56.jpg (24.03 KiB) Viewed 4725 times
Bending over the tabs. Will they break?
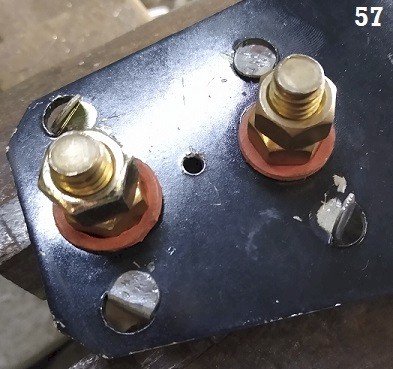
- 57.jpg (43.31 KiB) Viewed 4725 times
They did not.
Some paint.
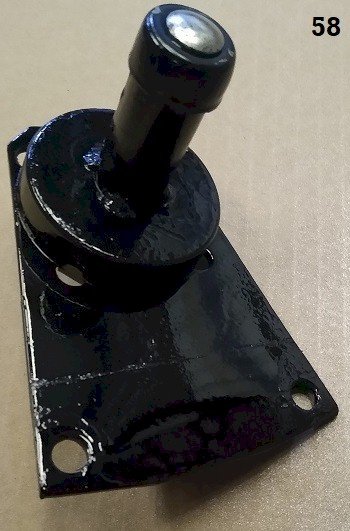
- 58.jpg (44.79 KiB) Viewed 4725 times
Used two wrenches to attach the positive cables so as to not spin the nuts internally.
Does it arc when the battery cut off is on? No.
Does it stick down and not return? No.
What is the travel distance? About 1/8" - 3/16".
Does the car start? Yes.
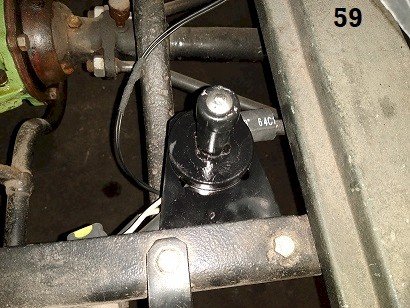
- 59.jpg (49.72 KiB) Viewed 4725 times
We shall see if it lasts longer than a new starter switch.
If I find more problems, then I'll let you know how I resolve them.
Suggestions are certainly welcome.
Re: New style Starter Switch fix
Posted: Sun Mar 03, 2024 3:08 am
by Duey_C
Dang, I like this Vern.
IF I see this correctly, you can turn the copper contact disc with the "knob" on top for new contact points?
Always neat "outside the box" info and thank you!
Re: New style Starter Switch fix
Posted: Sun Mar 03, 2024 5:51 am
by Allan
The original switches have a laminated, copper plated spring steel bridging piece on the plunger. This helps to disengage the plunger when your foot is lifted. The disc setup as shown will be depending solely on the spring return on the plunger to break contact, so it needs to be quite strong.
You might want to find an original switch as a back-up for your good work.
Allan from down under.
Re: New style Starter Switch fix
Posted: Sun Mar 03, 2024 7:33 am
by Jerry VanOoteghem
Allan wrote: ↑Sun Mar 03, 2024 5:51 am
The original switches have a laminated, copper plated spring steel...
Allan from down under.
I believe they were beryllium copper.
Re: New style Starter Switch fix
Posted: Sun Mar 03, 2024 8:30 am
by Charlie B in N.J.
Man that’s a lot of work and it still might weld itself together just relying on the spring. I’d use it to power a ford type starter relay hidden under the floor. You could use low voltage to power thenrelay or even use it to complete a ground to activate it. Nice work though.
Re: New style Starter Switch fix
Posted: Sun Mar 03, 2024 9:34 am
by Bryant
I appreciate how this thread has a step by step approach. A simple to the point title and Completion of the job before posting. This will make a topic search easier and help as a reference to anyone trying to fix there own problem later. Thank you for taking the time and patience to present it this way. And great work trying to solve a current new age part problem!
Bryant
Re: New style Starter Switch fix
Posted: Sun Mar 03, 2024 3:25 pm
by John kuehn
I have repaired or cleaned up original starter switch’s on my 3 T’s plus a couple more I’ve picked up as spares. I’ve read on the forum about the newer repos and how cheap made they are. Your post in repairing and rebuilding one is a good thing for folks who want to save a repo switch and how to make them better.
Another thing it shows is how cheap these things are made. The originals were simply just better made with good materials and well worth spending time to repair them when necessary. It’s always a good idea to pick up the original starter switch’s when you can at swap meets rusty or not. They are built like tanks and will last a very long time.
Re: New style Starter Switch fix
Posted: Sun Mar 03, 2024 11:54 pm
by Allan
Looks like beryllium copper it is Jerry. Is that the same stuff used in coilbox contacts? Learned something new today.
Allan from down under.
Re: New style Starter Switch fix
Posted: Mon Mar 04, 2024 6:27 am
by Jerry VanOoteghem
Allan wrote: ↑Sun Mar 03, 2024 11:54 pm
Looks like beryllium copper it is Jerry. Is that the same stuff used in coilbox contacts? Learned something new today.
Allan from down under.
Allan,
Yes, I believe it is the same stuff. They may also be phosphor bronze.
Re: New style Starter Switch fix
Posted: Mon Mar 04, 2024 8:38 am
by Jerry VanOoteghem
That was a great restoration write up! Thanks for taking the time and effort!
As to starter switches, these are my observations. First, I have repaired a few switches. Not claiming that makes me an expert. (Probably nobody else would claim that of me either

) The original style switch uses a multi layered "leaf spring" style moveable contact. My thought is that, when pushing down on the plunger, the leaf spring contact, after initially touching the studs, does a bit of flexing. Like any leaf spring, when it flexes, its arch somewhat flattens out and the spring elongates slightly. When the pressure is removed from the plunger, the spring re-arches and pulls away from the contact studs. As it re-arches, the spring length once again shortens up a bit. The significance of the small change in spring length, is that in doing so, any tendency for the leaf spring contact to weld itself to the contact studs is overcome by the leaf spring pulling laterally away from the stud, while at the same time being pulled upwards by the coil spring. In my mind at least, that's what's going on. To not have that lateral rubbing force on the contacts, due to the flexure of the moveable leaf spring contact, may lead to welding/sticking of contacts.
Borrowed image from the classifieds, (thanks Melba Nolan!)
- switch.jpg (59.92 KiB) Viewed 4296 times