Page 1 of 1
Body filler
Posted: Sat Aug 16, 2025 4:11 pm
by big2bird
I am closing in on my metal work on the touring.
I assume body filler has advanced since I was young.
What do you guys find "friendly" to work, sand?
Also that will not pop off. I used lead on major areas of wear, but I need to skim coating it for all the minor low spots.
I will be using Acrlic Lacquer I snuck into Kalifornia.

Re: Body filler
Posted: Sat Aug 16, 2025 6:51 pm
by ThreePedalTapDancer
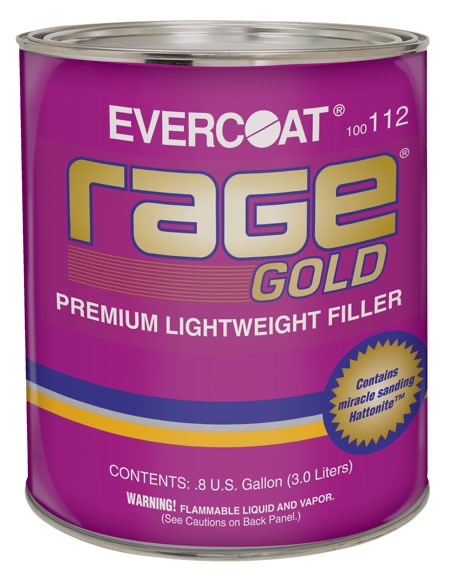
I have restored many vehicles, including paint, and prefer to only use Evercoat Rage Gold. Sands easy, lightweight. No shrinkage or lifting. I never use Bondo brand filler on serious restorations. It’s heavy, and eventually will shrink and lift. Only use professional products. I use epoxy primer on bare metal.
- IMG_6317.jpeg (111.32 KiB) Viewed 2247 times
Re: Body filler
Posted: Sat Aug 16, 2025 8:07 pm
by John kuehn
Make sure you clean the area really well and rough it up a little. It will last as long as your T.
Re: Body filler
Posted: Sat Aug 16, 2025 9:35 pm
by modeltspaz
Mr. Halsey.
You are correct to assume that polyester auto body filler is far removed from the early days of it's introduction to widespread use right after WW II. It was an inexpensive replacement for the difficult to use lead body filler that existed before the war. It was much easier to use and required fewer tools and experience. I've even heard stories about shady used car lots using plaster of paris and cardboard as a quick fix for rusted out, or damaged body work.
The difference between today's polyester body fillers and the "Bondo" of the post WW II era is several things. The biggest difference between yesterday and today is the dry media that's added to the polyester or, as it's sometimes called boat resin. The original additive to give the material some body was simply- talcum powder. The same material that you put on your baby's south side to keep it dry. It was unstable and constantly moved and shrank. Several years after its application, it began to move and shrink resulting in cracking. Often times it would wind up on the road as you drove along. To exacerbate the situation, amature users failed to properly prepare the surface and the polymer failed to bond to the base surface.
Today's automotive body filler is far and away from the products of the past. Today's fillers no longer use talcum powder. They use what are called "microballoons". These are microscopic spheres of glass and are not porus or unstable when mixed with resin. The resin has improved also. It's no longer simply polyester resin. The resin of today is an advanced formula that is much more stable than earlier versions of the old "boat resin".
One thing that must be stressed is the prep. The surface that is getting the filler must be CLEAN and free of wax and silicone. It also should be hammer and dollied out needing minimal body filler. You shouldn't have to roll the car on it's side to pour on the half gallon of filler you just mixed up.

One last bit of advice. READ THE DIRECTIONS ON THE CAN! The ratio of filler to catalyst (that comes in the little tube) is important. While the mix ratio is very forgiving, everything has it's limits. Be aware.
I hope my run-on explanation didn't put you, or anyone else that read this to sleep. Good luck.
Best Regards,
Mike "modeltspaz" Spaziano.
Re: Body filler
Posted: Sun Aug 17, 2025 1:21 am
by DHort
I was told by an expert restorer that primer goes on before the bondo. That the primer will seal the metal better than the bondo and prevent rust in the future. Then proceed as normal after the bondo is sanded. Makes sense.
Re: Body filler
Posted: Sun Aug 17, 2025 7:10 am
by South Park Zephyr
There are fillers that are specifically designed to apply over primers. Make sure that you do your research first to avoid failure.
Re: Body filler
Posted: Mon Aug 18, 2025 12:11 am
by Allan
Just make sure that whatever you use it is compatible with your choice of finish. It may be that modern fillers will not tolerate old school finishes. I too like to used acrylic lacquer, but using it over fillers made for water based finishes may be fraught with problems.
Allan from down under.
Re: Body filler
Posted: Mon Aug 18, 2025 12:40 pm
by big2bird
Allan, I have an email sent to Evercoat to verify compatability.
So far, it is meant for bare metal, but epoxy primer first is okay. Self etching primer is a no no. I'll post what they respond
Re: Body filler
Posted: Mon Aug 18, 2025 8:22 pm
by Allan
Good move Jeffrey. A mate of mine used a new filler that was put on OVER a base coat. That is a help, in that a flash rust preventing coat can be sprayed on bare metal before it gets a chance to rust. Then you have time to get on with the rest. It's hard to keep up with these developments when doing paintwork, sometimes years after the last job.
Allan from down under.
Re: Body filler
Posted: Tue Aug 19, 2025 1:06 pm
by BRENT in 10-uh-C
big2bird wrote: ↑Sat Aug 16, 2025 4:11 pm
I will be using Acrlic Lacquer I snuck into Kalifornia.
Not sure what your thoughts are, but there aren't really any benefits to using a non-catalyzed Lacquer vs. a two-component catalyzed urethane paint. The PPG line called Essential or Axalta's line called Imron are Catalyzed Urethans that have a lower quality pigment (-not as clear) which replicates the look of older Nitrocellulose Lacquers. The longevity of the catalyzed urethanes is probably 3 to 1 when compared to an acrylic.
While we use Evercoat's Rage Gold in my restoration shop, we use a slightly different approach. Evercoat has a product called EverGlass that is a Kevlar-stranded filler that is DTM. While it can be used successfully in depths of around ¼" thick, there really is no need in that. The benefit that EverGlass has is because it is waterproof, you don't need to worry about rust forming under the filler over time. Gold & Extreme do not have those qualities. EverGlass is VERY forgiving towards vibrations and twisting of the base (-i.e.: think fenders vibrating or the body panels flexing.)
A couple other points to ponder. It was mentioned above about applying filler over Epoxy. While some do have that preference, for what we do, I think there is a better way. When working the fillers, you will (should) be using the sheetmetal's surrounding areas of the low spot as a guide for leveling with sandpaper. So no matter how cautious, the likelihood that the sandpaper will be removing the epoxy is very good. Then if additional filler is needed in that area, it will be applied over bare sheetmetal. So in reality, the perfect scenario is to use a direct to metal (DTM) body filler, and then spray the entire panel with Epoxy primer before moving on to the Primer/Surfacers stage if you are adamant about using an Epoxy. (-personally I feel like it is a waste of time & materials if you use the following product(s).
Even though my shop is a PPG Gold certified shop, PPG has tested many of the Evercoat products and will accept them if they are applied according to Evercoats' instructions. Therefore our high-build Primer of choice is Evercoat Optex 4:1. It is a Polyester 2k surfacer that has a very high solids count. It sands very easy because it is a Poly, and it is DTM. It also is very water resistant for those who like to watersand before the topcoat. The other thing is many of us have tired eyes, and so seeing where we have sanded, ...and have not can be difficult. This product shoots Gray however when it dries, the surface turns Pink. As you sand, the Pink is rubbed away leaving a Gray surface. It is basically a built-in Guidecoat. Now here is the other unique part of this product. It can be rolled on instead of being sprayed. This is very beneficial to a hobbyist who does not have a dedicated spray gun with a 1.8 or 2.0 tip.
Just some other thoughts before I close this out. I will also offer that while I have professionally been in the restoration business since 1997, the way it was done then, vs. 5 years ago, vs. today is totally different. In other words, the technology has changed so much where someone's advice for a product they used maybe 3 years ago is likely obsolete now. PPG and Evercoat's factory reps come by about every quarter and they basically tell us to forget what we are doing because it has changed. Ohh, and did I tell you that we are phasing out sandpaper in our shop? Instead, we are using a product called AutoNet. Definitely better because it is more efficient and faster. Think different grades of the stuff you use to finish drywall.
Re: Body filler
Posted: Tue Aug 19, 2025 3:39 pm
by rickd
No! We can't get rid of sandpaper! Its taken me almost 30 years to get good at block sanding. Good write up Brent, excellent info. Thank you.
Re: Body filler
Posted: Tue Aug 19, 2025 5:06 pm
by big2bird
The short answer from the land of only water based base coat clear coat is, that crap doesn't look right on older cars. IMHO.
1980 or so the fenders, splash, r boards, rad shell, blah blah we're Acrylic Laquer and color sanded/ buffed, look nice. (Still). A little touch up required. Easy with lacquer.
I just need to finish the tub and do upholstery.
Christmas the family bought me all the same goodies to finish the car the same way. In my driveway, where color sanding forgives all.
I painted 6 cars in the 70's. Some laquer, some enamel. Still have my Devilbis and Binks squirt guns.
I just need to skim/ block/ squirt this car now.
I just need to know if this filler is lacquer friendly. If not, I'll just go old school all the way.
Re: Body filler
Posted: Wed Aug 20, 2025 7:55 am
by BRENT in 10-uh-C
big2bird wrote: ↑Tue Aug 19, 2025 5:06 pm
The short answer from the land of only water based base coat clear coat is, that crap doesn't look right on older cars. IMHO.
1980 or so the fenders, splash, r boards, rad shell, blah blah we're Acrylic Laquer and color sanded/ buffed, look nice. (Still). A little touch up required. Easy with lacquer.
I just need to finish the tub and do upholstery.
Christmas the family bought me all the same goodies to finish the car the same way. In my driveway, where color sanding forgives all.
I painted 6 cars in the 70's. Some laquer, some enamel. Still have my Devilbis and Binks squirt guns.
I just need to skim/ block/ squirt this car now.
I just need to know if this filler is lacquer friendly. If not, I'll just go old school all the way.
Again, your car, your $$, your choice on what topcoat product to use.
If you have used Lead to fill in your worst areas, then I would by-pass the Fillers mentioned above and move directly to a Surfacer. The Optex 4:1 is the perfect product for you in this situation since it is approved for direct to metal applications, -AND you can apply it with a foam roller that your big box stores sell in their paint department. Additionally, you will actually save material since there is no material loss in the overspray. You will save time on paint gun clean-up too -and since you are applying it in your driveway, your neighbors and 'Big Brother' should be happy. And for what its worth, this stuff sands WAY easier than Rage Gold Filler does, and feathers out easier. If by chance you do find one low area that you missed, then use US Chemical's Icing Putty. Icing is also a Polyester product so the compatibility with the Optex is there.
Re: Body filler
Posted: Wed Aug 20, 2025 1:54 pm
by big2bird
This is what TCP coatings told me
Still digesting all this. I have a few weeks of stuff to do first.
Re: Body filler
Posted: Thu Aug 21, 2025 4:32 pm
by BRENT in 10-uh-C
big2bird wrote: ↑Wed Aug 20, 2025 1:54 pm
This is what TCP coatings told me
Kinda like a Politician's answer, ....huh.??.
Geez, there is not a thing wrong with spraying Epoxy primer over the top of the substrates to act as a Sealer, ....
except you just spent many hours blocksanding to 400, -or 600 grit only to find yourself priming with Epoxy that now has left a slight orange-peel texture -thus now that Epoxy sealer has hidden all of your smooth substrates. And you know that won't show in your topcoat providing you add a couple more coats of Lacquer paint to get the topcoat mil thickness up there. Paint is cheap these days, so why not just put enough on where you can spend long hours Colorsanding it back off to get to a flat surface.

