Page 1 of 1
Initial E-Brake Installation and Adjustment
Posted: Fri Aug 02, 2019 11:36 am
by RustyFords
I installed two factory brake rods last night (and removed the two home-made ones that came with my car) and have two new lined brake shoes. So...I'm ready to do the initial installation and adjustment of the e-brake system.
I googled some old MTFCA forum posts about tips/tricks/knowledge on how to do this, but the few that I found were hard to follow.
I'd really appreaciate a step by step on how to do this. I haven't set the hand brake for "free-neutral" yet and I know I need to do that first....but from there I'm flying blind. I understand that it's just a simple cam that's opening up the brake shoes, but I'm sure there are some good hints and procedures that you pros can offer.
And...FWIW...after this task, all I need to do is install the cooling system and I'll be able to take a first drive in my car.
Re: Initial E-Brake Installation and Adjustment
Posted: Fri Aug 02, 2019 12:19 pm
by CudaMan
Here's how I did mine, you may have seen this older thread already.
http://www.mtfca.com/discus/messages/50 ... 1420743911
My method doesn't match the procedure in the service manual, but it ensures that you don't adjust the brake rods too long. If they are too long, they will resist the full forward motion of the brake lever, potentially preventing full engagement of the high gear clutch.

Re: Initial E-Brake Installation and Adjustment
Posted: Fri Aug 02, 2019 1:22 pm
by Scott_Conger
Don
dealing with an as-is car such as you are, you should be aware of a really handy accessory that I just used on a car that wasn't going to get new brake cams in the backing plates.
https://www.modeltford.com/item/2557-8S.aspx
I've known about them all along, but never used them. They are nifty!
You put these on the cams if you find that it takes excessive movement to get the brakes to lock up...the deal is that when the cams are so worn that you must shorten the rods excessively, the cam levers are always "forward" and you lose a lot (nearly all) of mechanical advantage. With these things tapped into place on the cams, the cam lever assumes a backwards cant when relaxed (as designed), and when the brake rods go forward, the lever has the most mechanical advantage "straight up", and the cam is also in the process of creating the greatest "lift" for a given rotation.
The best fix is cam and backing plate bushing replacement, but having used these things now, I highly recommend them if someone doesn't want to go to that effort...they really do improve things. Always put s schmeer of grease on the cam/brake interface before buttoning things up, too.
Re: Initial E-Brake Installation and Adjustment
Posted: Fri Aug 02, 2019 4:28 pm
by Norman Kling
After you adjust as posted above, try to stop the car using only the parking brake. If it pulls to one side, tighten the opposite side 1/2 turn and try again. Continue to do this until it pulls straight. Then check to be sure the car will coast when in neutral.
Norm
Re: Initial E-Brake Installation and Adjustment
Posted: Fri Aug 02, 2019 6:23 pm
by Art Ebeling
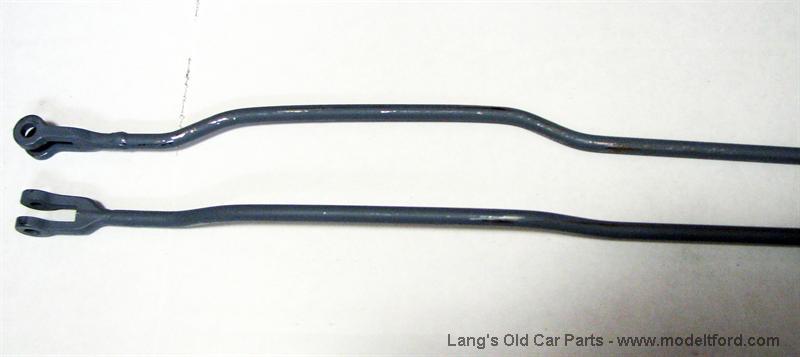
I am at the same point on my 11. With the lever fully forward where does the pawl end up on the quadrant? I welded and shaped a new tip on mine and it stops on the last or most forward tooth on the quadrant. Should it go beyond that? Also someone has straightened my brake rods. Can someone describe the bends at the rear?
Re: Initial E-Brake Installation and Adjustment
Posted: Fri Aug 02, 2019 6:34 pm
by Scott_Conger
Art
it looks like you're fine
for brake rods, you can't go far wrong by copying this:
https://cdn.modeltford.com/i/c/1510708l.jpg
Re: Initial E-Brake Installation and Adjustment
Posted: Fri Aug 02, 2019 8:47 pm
by Chad_Marcheese
I hope I am not hijacking this post, but has anyone found that they need to add a significant amount of preload to the clevises? If I do essentially as Mark posts in his method, the wheels never get to the point that they lock up. I have to essentially make my brake rods much shorter adding a bunch of preload to the shoe cam. Almost as if the linings could be a little bit thicker, or the cams could be a little more robust in material when in the at rest position.(I have a 26-7 rear in my '25). I installed new cams, bushings and shoe linings in the rear upon rebuild.
And that all aside, if I understand the stock adjustment as it should be, that means that the shoes should be lightly riding on the drum when the lever is straight up, causing a slight friction on the drum---correct?
Re: Initial E-Brake Installation and Adjustment
Posted: Fri Aug 02, 2019 9:24 pm
by Allan
I use Mark's method. The lever is set in the fully forward position to mimic driving in top gear. You do not want any dragging when driving. The cam is set to the rear of its travel so that when the lever is pulled to the neutral position it pulls the cam into level or just to the front, maintaining the brake shoes in a non drag setting.
Allan from down under.
Re: Initial E-Brake Installation and Adjustment
Posted: Fri Aug 02, 2019 9:31 pm
by Allan
Chad, if you have new bushes and cams, and new lined shoes, and you still have no good emergency brake, I would be looking for worn brake drums. The cheap fix usually is to fit a shim on the cam to spread the shoes somewhat. With all new parts at that point, your brake drums are allowing the shoes to expand beyond the effective range of the cam. Cam shims may work, but a pair of new drums would be prefrable.
Hope this helps,
Allan from down under.